
Showing posts with label Discovering Creativity. Show all posts
Showing posts with label Discovering Creativity. Show all posts
Thursday, October 06, 2016


4 Cut The Replacement Glass

This week We put up a video which is five steps to doing a simple straight forward stained glass repair.
This fourth step is to cut, grind and fit the replacement glass. It doesn't have to be perfect. Remember that when building a panel you leave a little wiggle room, the same can be true with a repair.
To Get Additional Videos That We Don't Post To YouTube Sign Up Here
To View the video click here
3 Tap and Remove The Glass

This week We put up a video which is five steps to doing a simple straight forward stained glass repair.
This third step is to tap and remove the broken or damaged piece of glass. We do this gently so as not to damage the surrounding foil on adjacent pieces of glass.
Then as we remove the copper foil, we are careful to only remove the inner circle of foil.
To Get Additional Videos That We Don't Post To YouTube Sign Up Here
To View the video click here
Tuesday, October 04, 2016
2 Heat Up Your Soldering Iron

This week We put up a video which is five steps to doing a simple straight forward stained glass repair.
This second step is to heat up your soldering iron so you can desolder the metal around the damaged piece of glass.
To Get Additional Videos That We Don't Post To YouTube Sign Up Here
To View the video click here
Monday, October 03, 2016
1 Score The Bad Piece
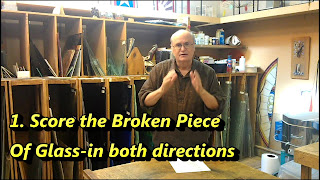 This week We put up a video which is five steps to doing a simple straight forward stained glass repair.

This first step is to cut and score the broken or damaged piece of glass. We do this in both directions so the glass will be easy to remove.
Some students have asked if they could try to save the glass by de-soldering without scoring the glass. This can be done, but we're a production studio, which means that we need to get results quickly and the extra time and effort of saving a piece may not be worth it.
To Get Additional Videos That We Don't Post To YouTube Sign Up Here
To View the video click here
Friday, September 23, 2016
5 Do the Other Side

In this weeks video, I show how a stained glass window has separated from the frame work and the steps to fix it.
The fifth thing is to do the other side. Place more foil directly over where you did on the first side, place re-strip and solder the panel.
Then clean and patina and it will be better than new.
To view the 10 min video for no charge click here
Here's your chance to register with us and get free videos and pdfs and special offers sent to you click here
Thursday, September 22, 2016
4 Solder The Re-Strip

In this weeks video, I show how a stained glass window has separated from the frame work and the steps to fix it.
The fourth thing to do is Solder the re-strip onto the copper foil, forming a lead line, being careful not to add too much heat and cracking the glass.
To view the 10 min video for no charge click here
Here's your chance to register with us and get free videos and pdfs and special offers sent to you click here
3 Clip A Strip of Metal

In this weeks video, I show how a stained glass window has separated from the frame work and the steps to fix it.
The third thing to do is clip and place a strip of re-strip metal over the copper foil tape you just added. This will add a great amount of strength.
To view the 10 min video for no charge click here
Here's your chance to register with us and get free videos and pdfs and special offers sent to you click here2 Add Copper Foil To Begin to form a New Lead Line

In this weeks video, I show how a stained glass window has separated from the frame work and the steps to fix it.
The second thing to do is add copper foil tape where you want to form a strong lead line. Clean the glass well so the foil will stick readily to the glass, use a craft knife or box knife to trim the ends of the foil.
To view the 10 min video for no charge click here
Here's your chance to register with us and get free videos and pdfs and special offers sent to you click here1 Pull Metal Back

In this weeks video, I show how a stained glass window has separated from the frame work and the steps to fix it.
The first thing to do is pull the separated metal back into place. I simply nailed some wooden blocks to the work bench to give myself a clamping surface, then used wood clamps to gently pull the metal back into place.
To view the 10 min video for no charge click here
Here's your chance to register with us and get free videos and pdfs and special offers sent to you click here
Subscribe to:
Posts (Atom)